
Here are some briefely what is Magento 2 is a powerful open-source e-commerce platform that runs on flexibility and scalability and is an ideal choice for big online stores. When compared to its predecessor, Magento 2 has been significantly enhanced with performance, user experience, and code accessibility.
This Magento 2 tutorial provides information on setup, operation, and customization of your e-commerce site on virtual private server (VPS). It will walk you through store configuration, product setup, and on to some advanced features like API integration and performance optimization.At the conclusion of this article, one will have enough information to practically bootstrap your online business and expand it with Magento 2.
Magento 2 Architecture
Magento 2 follows the Model-View-ViewModel architecture pretty much, while there is the popular Model-View-Controller.
The difference is with the ViewModel beans in an MVVM architecture, which more or less works itself when it comes to data flow between the Model and the View, rather than a more hands-on approach by the Controller under MVC.
This architectural paradigm separates the business logic from the user interface (UI). This separation is useful when one wants to modify or customize business aspects, such as special promotions or pricing rules, without affecting their presentational view in front of a shopper.
Let’s examine each element in more detail:
Model
All logic pertaining to data is stored in this component.
Regardless of any user interface, the Model depicts the real data or information that the program handles, such as customer or product lists.
It reacts to the ViewModel’s information requests as well as commands to modify the state, such changing the price of a product.
Look
The View in Magento 2 is made up of components like the layout, buttons, and displays that make up the storefront that customers interact with. It transmits user commands, like as clicks and selects, back to the ViewModel and shows the user data from the ViewModel.
ViewModel
The ViewModel is the mediator between the Model and the View. This is to fetch the data from Model that is ready to display on View. It also handles any user input that the View passes to it. This separation allows better code organization and greater modularity of the system.
There are even four different tiers for Magento 2 itself. These layers form a structure that defines everything from a user interface to data administration and storage.
Layer of Presentation :-The front-end layer handles all user interactions and consists of blocks, layouts, templates, and web components. This is where the ViewModel runs, handling logic, sending commands to the Model for updates or data retrieval.
Service Layer :- This layer also provides service contracts (APIs) through which external systems or other modules can interact with Magento 2. The service layer allows features to be accessed both internally and externally without risking the integrity of the system.
Domain Layer :- This is where the real business logic of Magento 2 lives. It has the models and methods implementing the core functionality of the system ti handle data and business rules
Persistence Layer :- In summary, the persistence layer at the bottom of architecture manages the data storage and retrieval operations. Internally, it works with data models and resource models to execute the operations against the DB, while ensuring data integrity and avoiding leakage.
Magento 2 Storefront
So before you apply our Magento 2 development tutorial, you should be aware how does your online shop look like and what does it behave like from a customer’s ticket. In this guide, we’ll walk you through the storefront’s standout pages and features that drive customers down the path toward purchase on your site.
Home Page
Your home page is the face of your brand. Commonly, it will includes a clean and welcoming layout with sliders of promotions, navigation bar for easy access to different categories, and also highlighted or new products. The first page should ‘wow’ — be visually attractive and process intuitive.
Catalog Page
This page displays all your products or a specific category of products. It should offer filters and sorting options to help customers find what they’re looking for quickly. Product thumbnails should include high-quality images, brief descriptions, and prices to encourage further exploration.
Search Results Page
A robust search feature is important for enhancing user experience. The search results page should clearly display products that match the customer’s query with options to refine the search. This page helps customers quickly navigate through a large inventory to find their desired products.
Product Page
The product page is where details matter most. It should include high-resolution images, informative product descriptions, availability, pricing details, and an easy-to-spot ‘Add to Cart’ button. Additional features include customer reviews, related products, and social share buttons to enhance user engagement.
Shopping Cart
The shopping cart page should summarize the products selected with total costs, and provide options to update quantities or remove items. It should also display available shipping options, estimated delivery times, and a clear call-to-action for proceeding to checkout.
Accessing Your Magento 2 Dashboard
Accessing the Magento 2 admin dashboard is your first step toward managing your online store. This central hub is where you’ll oversee all aspects of your eCommerce operation, from sales data to customer interactions.
Logging In as an Admin
Here’s how to log in to the Magento 2 admin panel:
Navigate to your website’s admin URL, which typically looks like yourdomain.com/admin.
Enter your admin username and password, and click Sign In.
Once authenticated, you’ll be directed to the dashboard.
Exploring the Dashboard
The Magento 2 dashboard presents a complete overview of your store’s performance. It includes key metrics, recent orders, average order amount, search terms, last orders, and best-selling products.
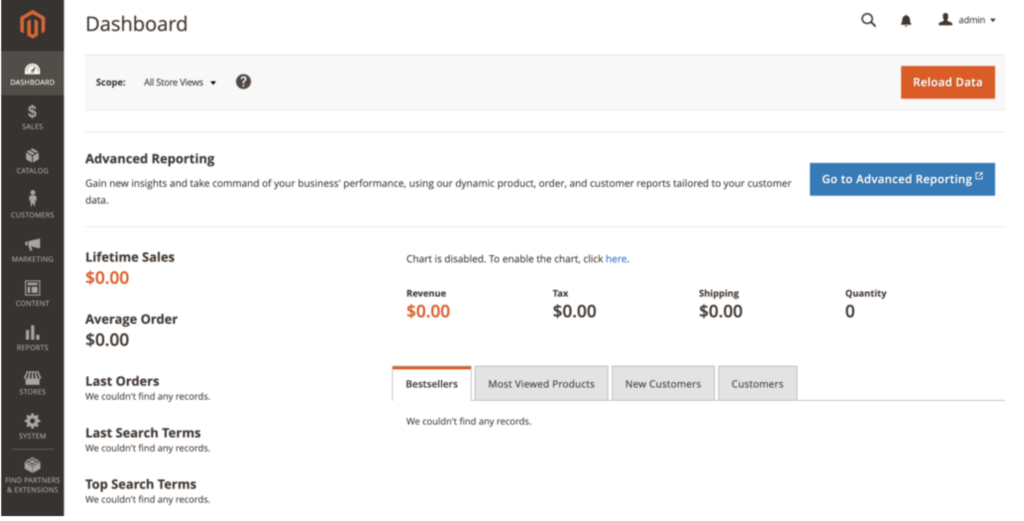
The bottom of the dashboard displays several necessary charts and reports. You can view sales over time, customer activity, and other vital statistics that help you make informed business decisions.
Accessing the Admin Account Section
In the upper-right corner of the dashboard, you’ll find the account section. Here, you can manage your account settings, including your username, password, and email address.

Navigating the Admin Sidebar
The admin sidebar on the left of the screen is your main navigation tool within Magento 2. It contains links to all administrative functions such as Sales, Products, Customers, Marketing, Content, and Reports. Each section is designed to manage specific aspects of your store’s backend.
Understanding the Admin Workspace
The central part of your admin screen, known as the workspace, displays the content of whichever menu item you select from the sidebar. This area will typically show grids, data forms, and tools related to store management.
Configuring Your Store
Properly configuring your Magento 2 store is crucial to ensure it aligns with your business needs and complies with local regulations. This section covers the essentials of setting up various store configurations, from user roles to currency settings.
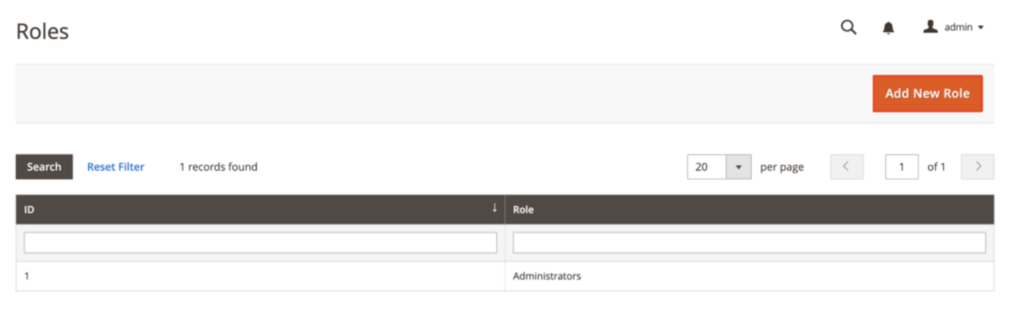
Creating New Users and Roles
It’s important to create specific roles for your team members based on their responsibilities to improve security.
- Navigate to the Admin sidebar and click System → Permissions → User Roles.
- Click Add New Role and fill in the necessary details for the role, including the role name and specific resources that the role can access.
- After creating roles, go to System → Permissions → All Users to add new users.
- Click Add New User and fill in the necessary details such as username, email, and password.
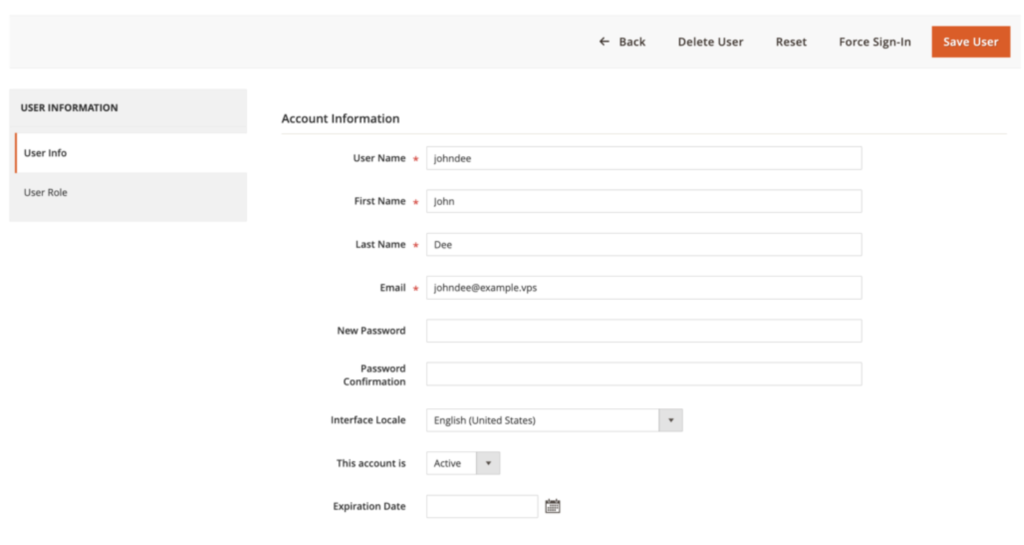
- Assign specific roles based on those you have previously created to the new user under the User Role tab. Once done, click Save User.
Configuring Store Details
Setting up your store’s basic information helps how customers perceive and interact with your brand.
- Go to Stores → Configuration → General.
- Enter your store information, including the name, phone number, hours of operation, and other relevant contact details.
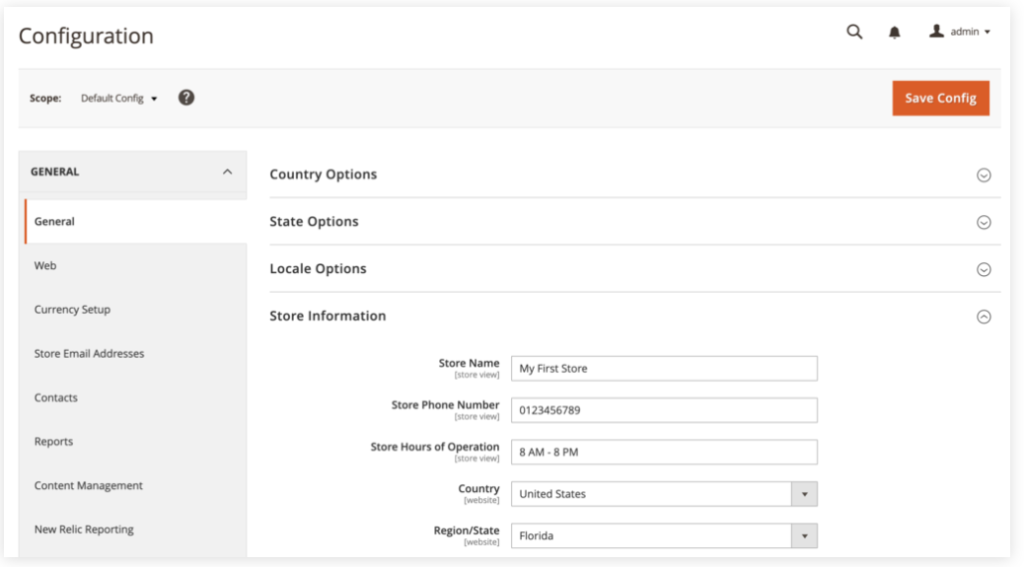
- In the Country Options section, select the default country where your business is based or primarily operates.
- Depending on the selected country, you may also need to set the default state or province.
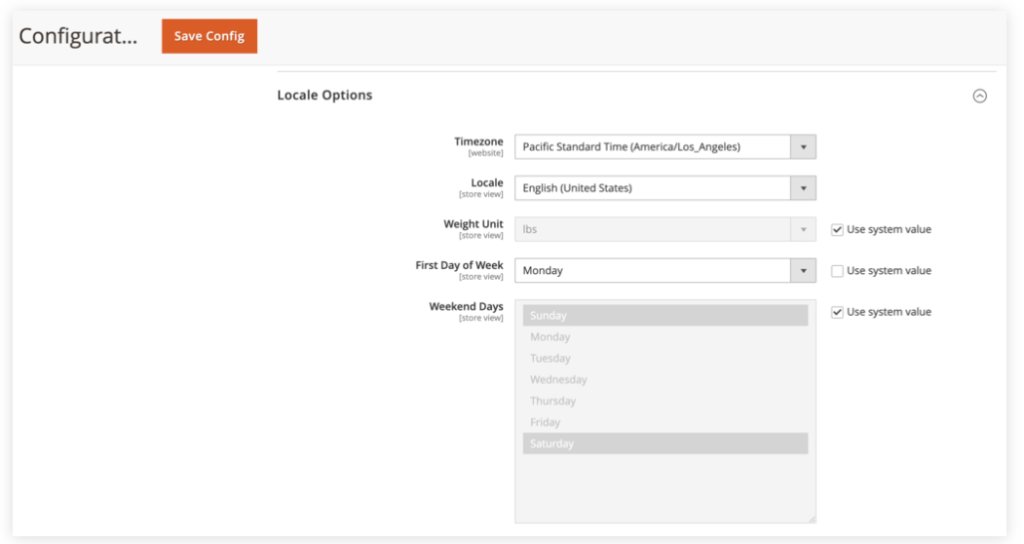
- In Locale Options, choose the locale that best suits your business’s language and regional settings to tailor the shopping experience to your audience.
Setting Up Web-related Settings
This part involves configuring your URLs and other web-related settings.
- Navigate to Stores → Configuration → General → Web.
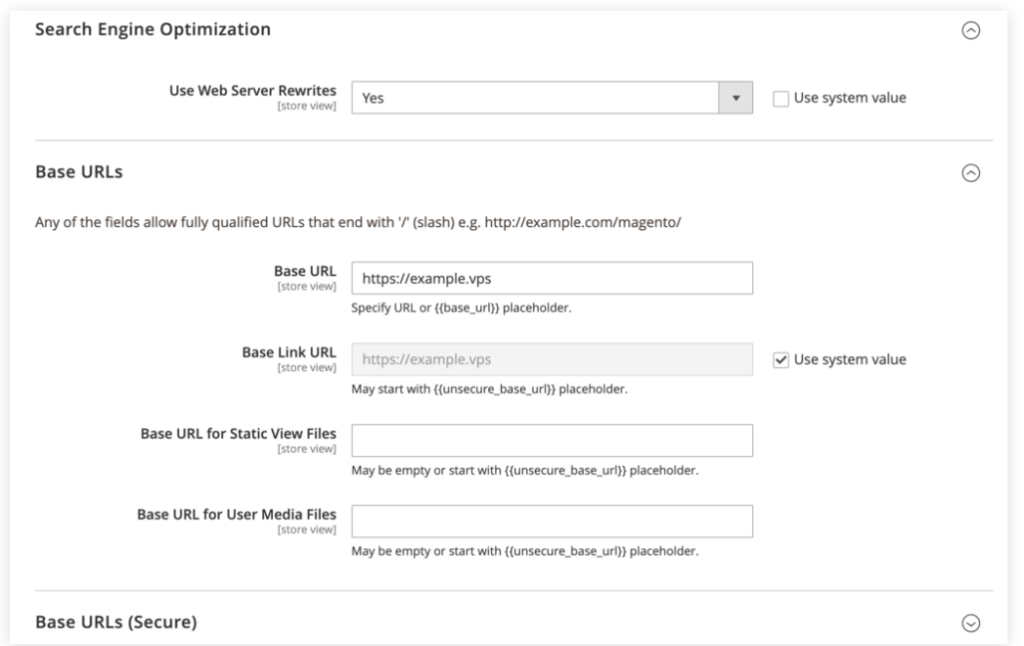
- Enable the Search Engine Optimization option if you wish for search engines to crawl and index your website.
- Adjust your base URLs and secure those URLs if you are using SSL certificates.
- Manage your default pages, such as the home page and no route page, and configure URL rewrites and redirects.